
Drum brakes, while less common on modern front wheels, are still widely used on the rear of many vehicles due to their durability and cost-effectiveness. Over time, brake shoes wear out and must be replaced to ensure proper stopping power and vehicle safety. This guide will walk you through how to replace drum brakes in a car or truck, step-by-step, using the right tools and techniques.
Whether you’re a seasoned DIYer or a first-timer, understanding drum brake components and procedures will save you money and provide peace of mind on the road.
Tools and Safety First
Before starting the job, make sure you have a safe, flat workspace and the following:
- Jack and jack stands
- Lug wrench
- Brake spring tool
- Needle-nose pliers
- Flat-head screwdriver
- Drum brake cleaner
- New brake shoes and hardware kit
We recommend the Performance Tool W175C Drum Brake Tool Set, which combines several brake-specific tools in one affordable kit—ideal for avoiding frustration with tricky springs and clips.
Always wear safety glasses and gloves. Brake components often contain dust, and safety should never be compromised.
Step-by-Step Drum Brake Replacement
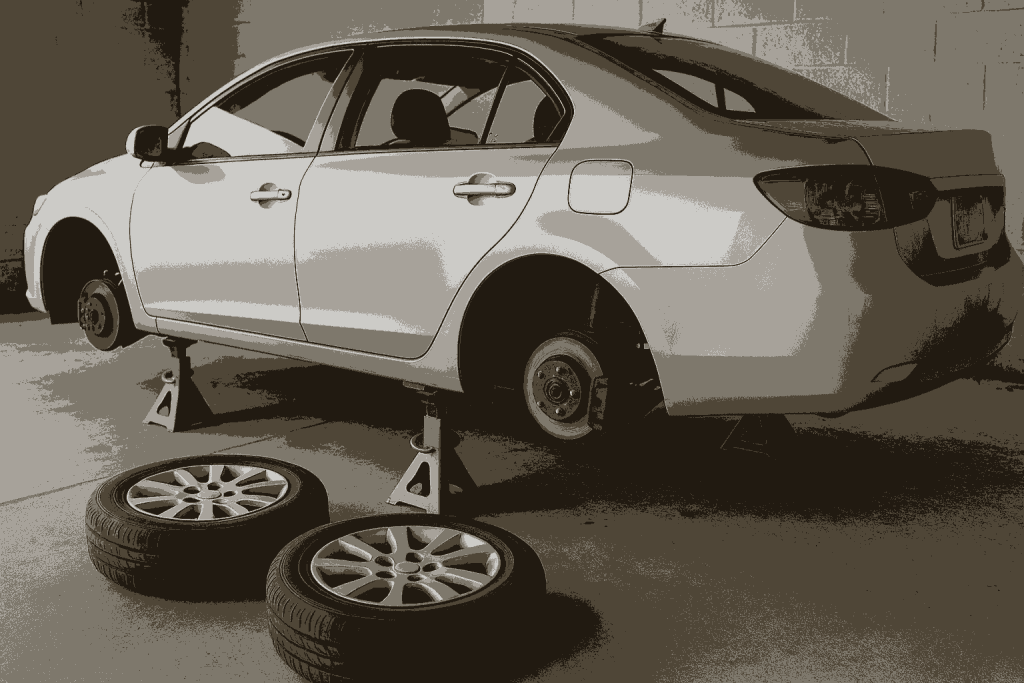
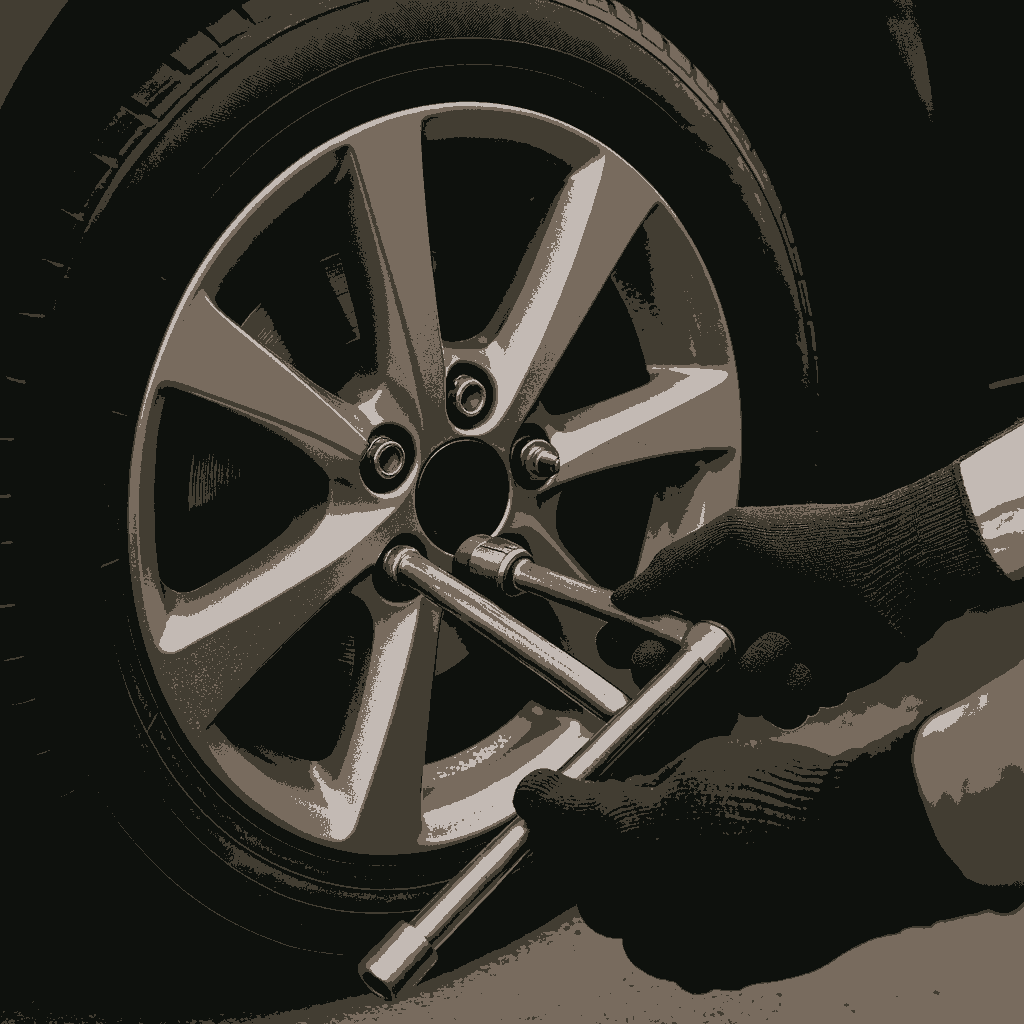
Step 1: Loosen the Lug Nuts and Lift the Vehicle
Use a lug wrench to loosen the lug nuts on the wheel before lifting the car. Raise the vehicle using a jack and secure it with jack stands. Never work under a vehicle supported only by a jack.
Remove the wheel and set it aside.
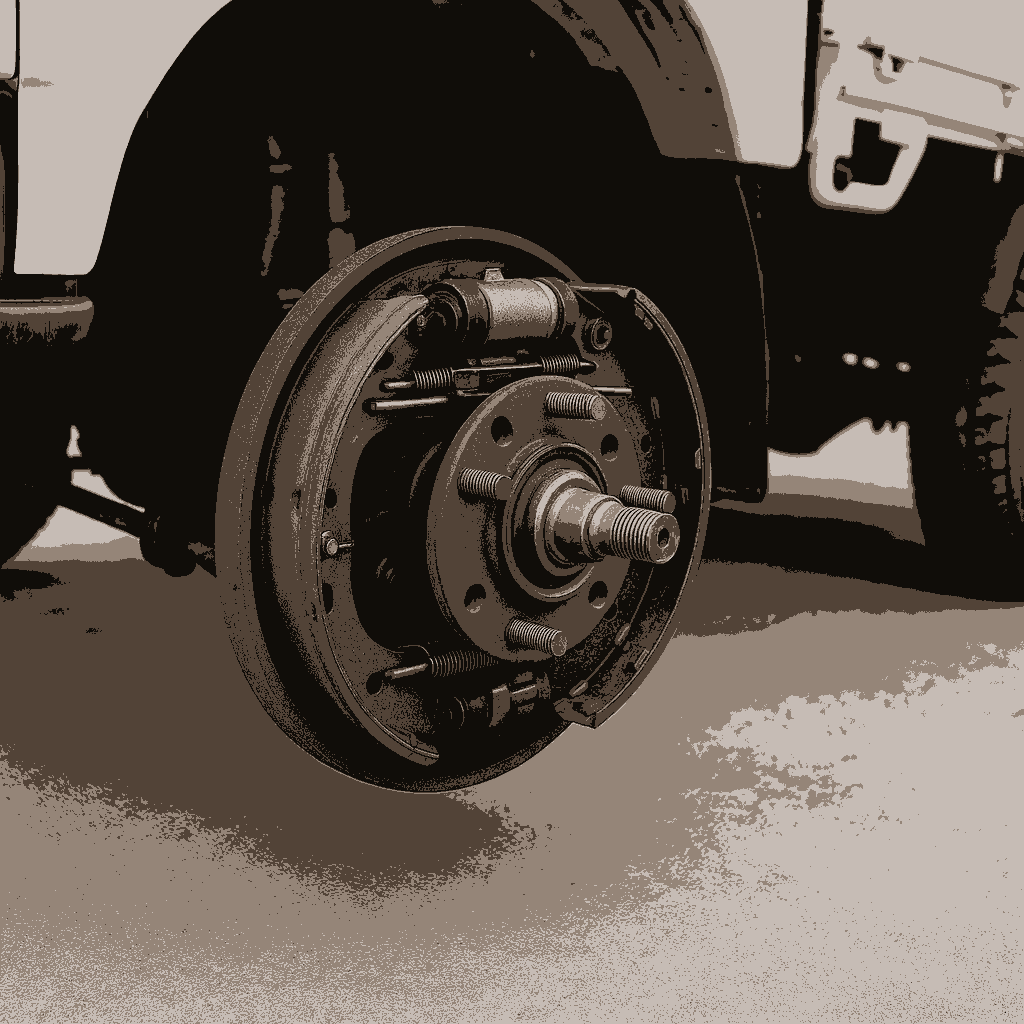
Step 2: Remove the Drum
The drum may slide off easily, or it may be stuck due to rust or brake shoe tension. If it resists, gently tap around the edges with a rubber mallet. For stubborn drums, try backing off the adjuster through the access hole using a flat screwdriver.
If you’re working on an older vehicle, consider using penetrating lubricant to break through rust around the hub and drum edges.
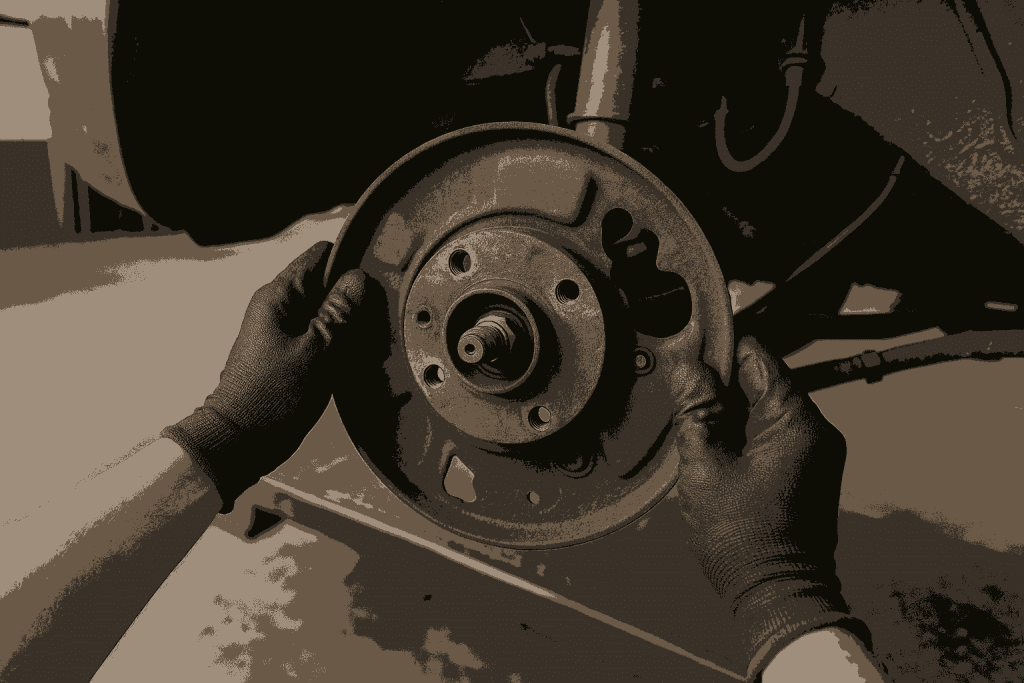
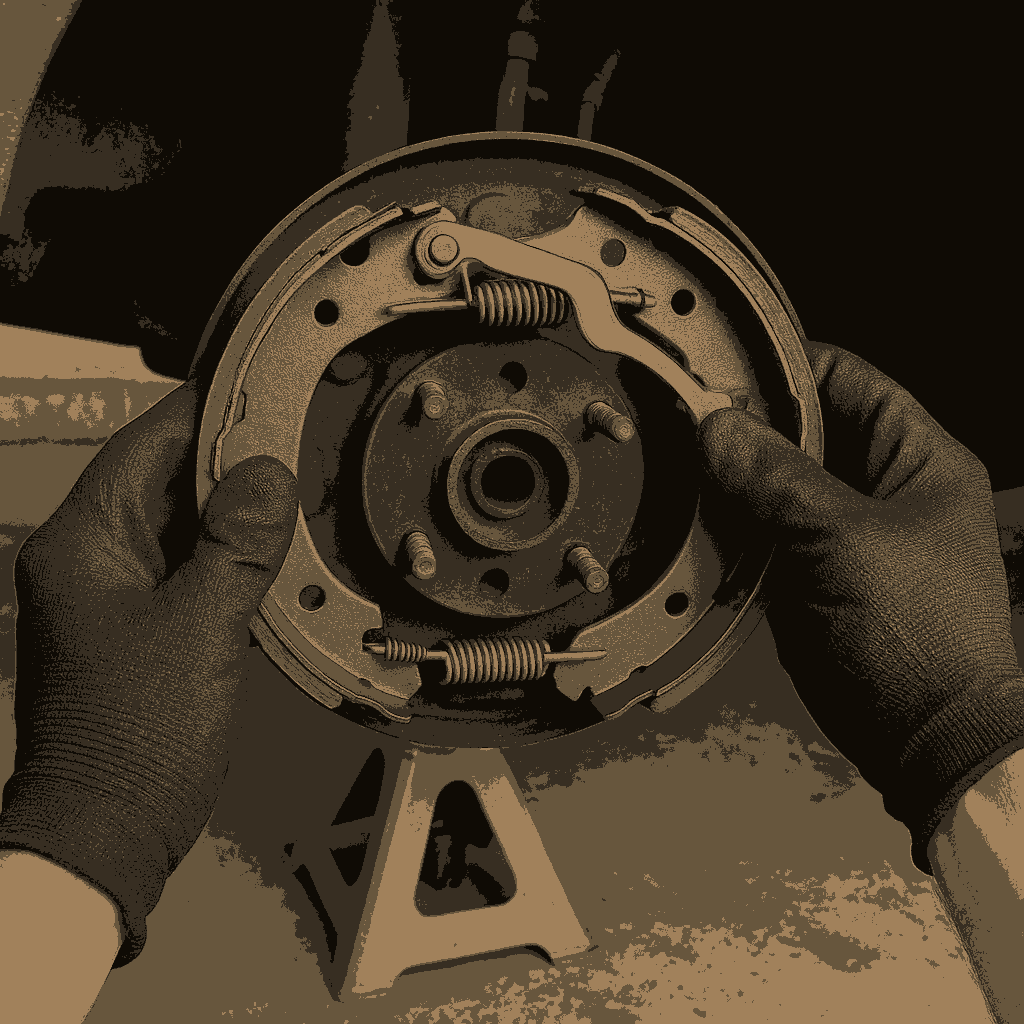
Step 3: Take a Photo of the Setup
Before removing any parts, take a clear photo of the drum brake assembly. This visual reference will be extremely helpful when reassembling later.
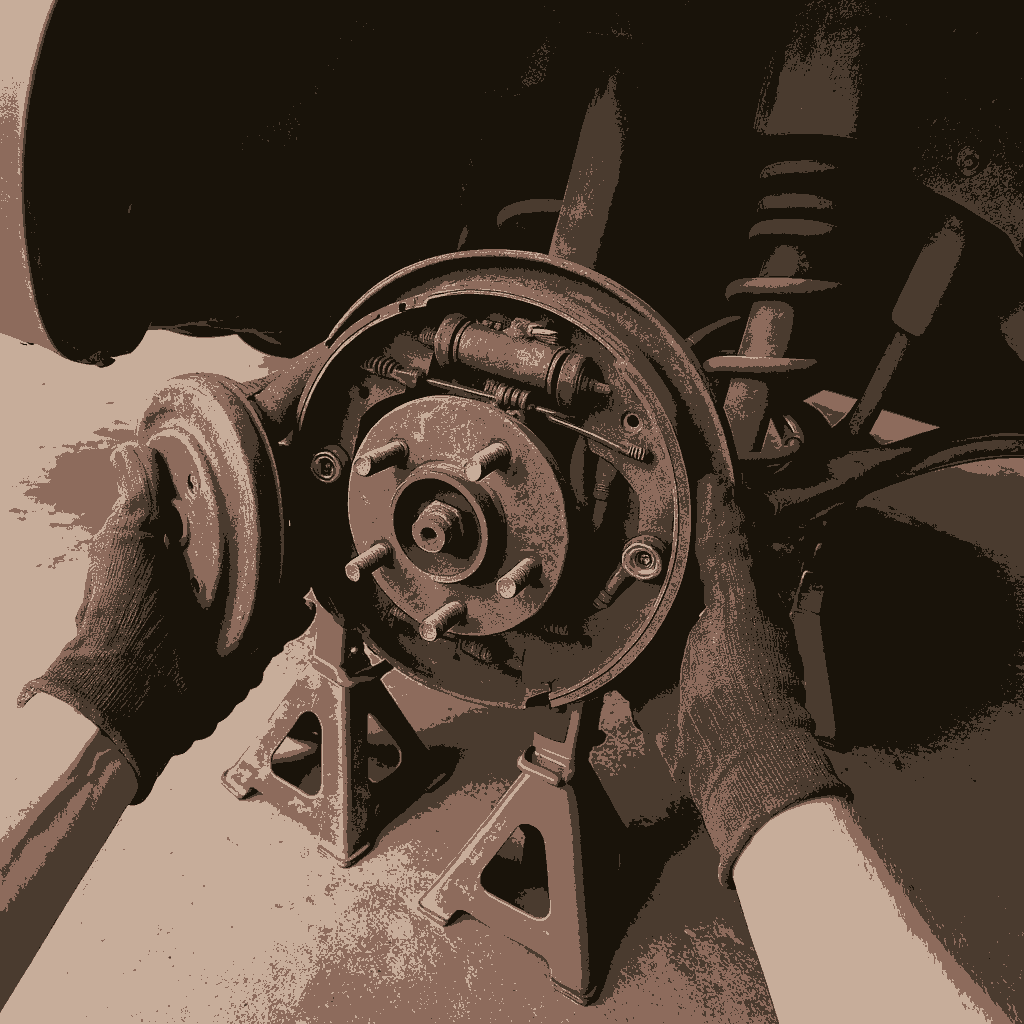
Step 4: Remove Brake Shoes and Hardware
Carefully unhook the return springs using a brake spring tool or needle-nose pliers. Remove the hold-down springs, adjuster, and other components. Be cautious of the parking brake cable; disconnect it without damaging the linkage.
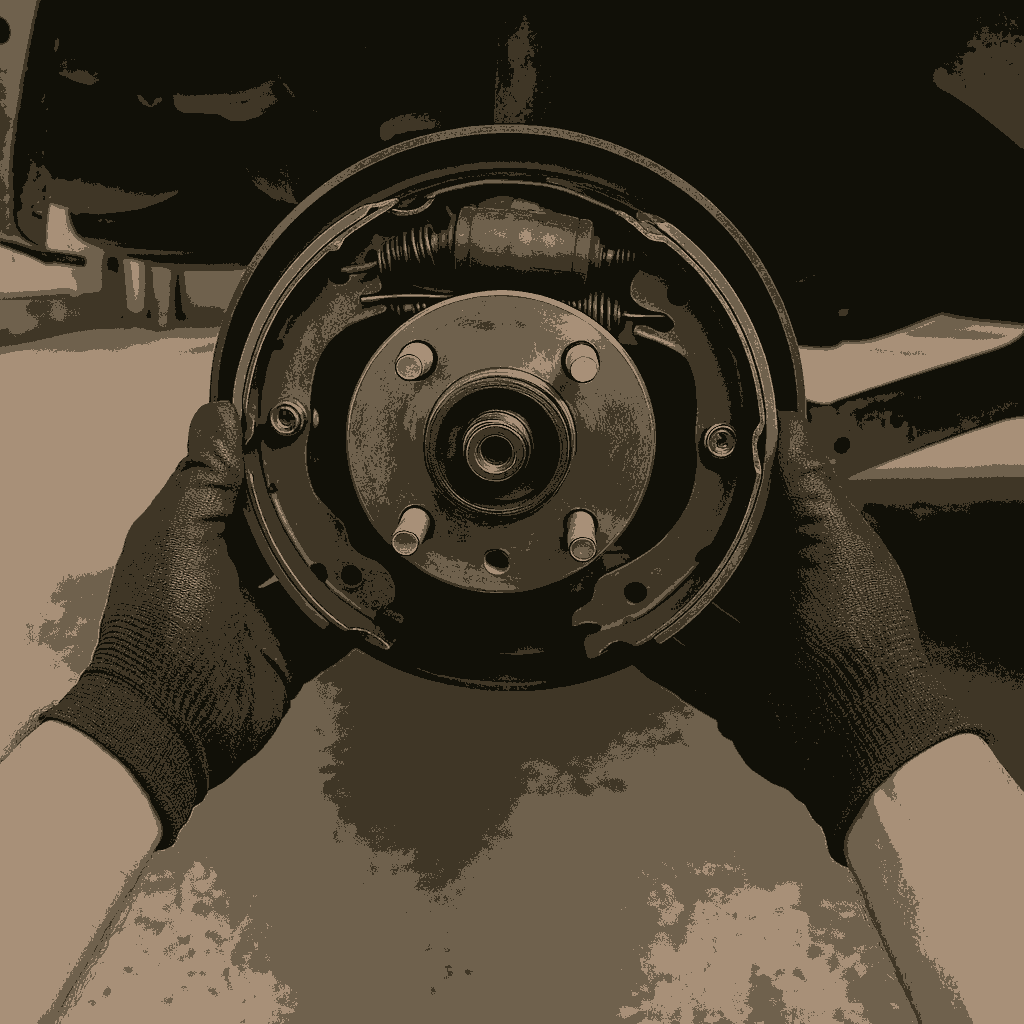
Once all parts are removed, inspect the backing plate for excessive wear or damage. Clean the entire area using brake cleaner to eliminate dust and grease. Avoid using compressed air, as brake dust may contain harmful materials.
Step 5: Install New Hardware and Brake Shoes
Start by attaching the new brake shoes to the parking brake lever. Then, place them onto the backing plate and reconnect the hold-down pins and springs. Install the adjuster, making sure it’s clean and properly lubricated.
Reattach the return springs in the same configuration as your reference photo. Some kits include new adjuster wheels and star screws—replace these if included.
If you haven’t already purchased new brake shoes, the Wagner Z474 Brake Shoe Set offers OEM-level performance and compatibility with many common makes and models.
Step 6: Adjust the Brake Shoes
Turn the adjuster wheel outward to slightly expand the shoes. Test-fit the drum—there should be minimal resistance when sliding it over the shoes. Adjust until you feel a slight drag when turning the drum by hand. This ensures optimal brake response.
Step 7: Reinstall the Drum and Wheel
Once everything is adjusted, slide the drum back over the new brake shoes. Replace the wheel, hand-tighten the lug nuts, and lower the vehicle back to the ground.
Use a torque wrench to tighten the lug nuts to the manufacturer’s specifications.
Step 8: Pump the Brake Pedal
Before driving, pump the brake pedal several times until it feels firm. This seats the new shoes against the drum.
If your vehicle has rear drum brakes that contribute to the parking brake system, test the handbrake as well.

Final Thoughts
Replacing drum brakes might seem complex at first, but with the right tools and a methodical approach, it’s a job that most mechanically inclined individuals can handle in a few hours.
The key is to stay organized, take your time, and follow best practices.
If you found this guide helpful, check out our other detailed how-to articles on brake line replacement, power steering pump repairs, hidden kill switch installation, and more. Whether you’re tackling basic maintenance or advanced upgrades, our blog is your trusted source for DIY auto repair.