
The water pump is a vital component of your vehicle’s cooling system, responsible for circulating coolant through the engine and radiator to prevent overheating. When a water pump fails—typically due to wear, bearing failure, or gasket leaks—it can lead to overheating, engine damage, or complete breakdown.
Replacing it promptly is essential, and with the right tools and guidance, it’s a manageable DIY repair. This guide walks you through how to replace a water pump in your car safely and efficiently.
Tools & Preparation
Before beginning, park your vehicle on level ground, allow the engine to cool completely, and disconnect the battery. You’ll need:
- Basic socket set
- Drain pan
- Gasket scraper
- Torque wrench
- New coolant
Depending on your car’s design, you may also need to remove accessory belts or timing covers.
Step-by-Step Instructions
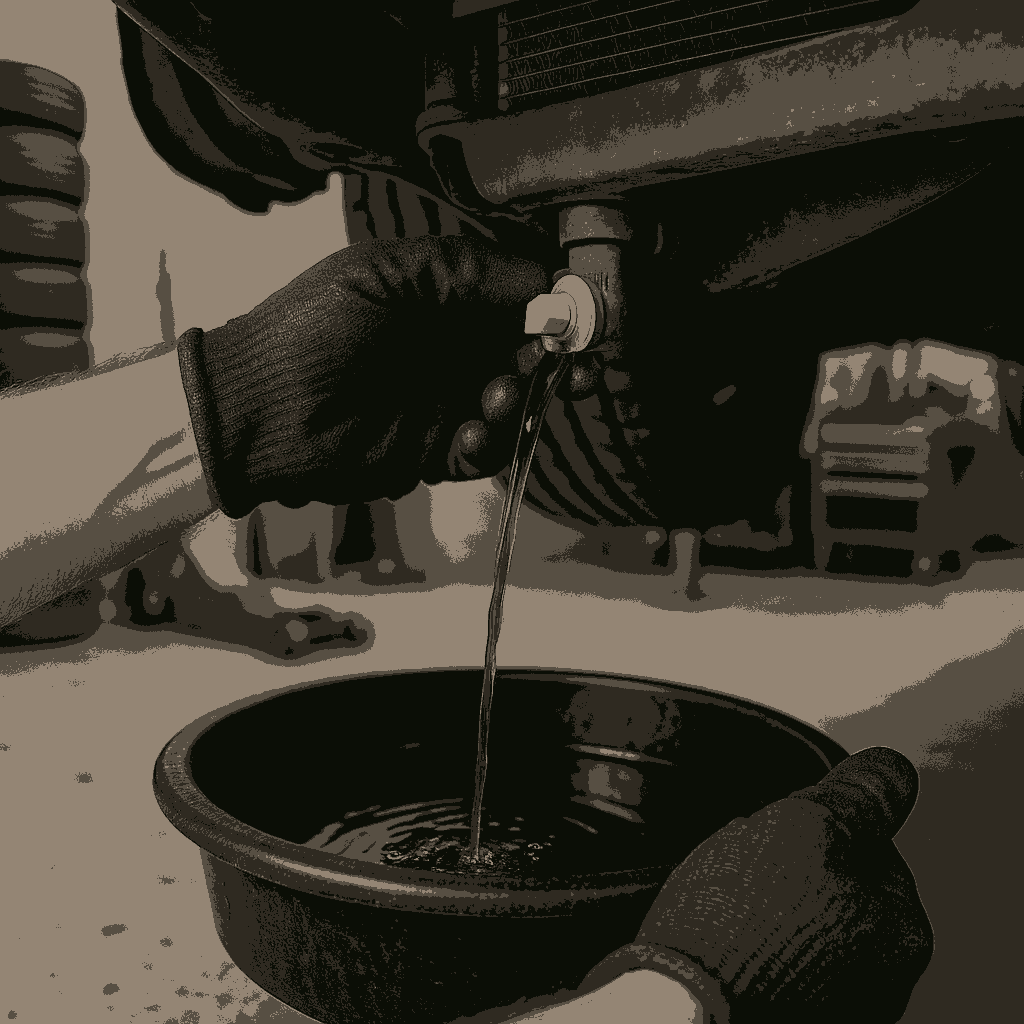
Step 1: Drain the Coolant
Begin by placing a drain container beneath the radiator drain plug or lower radiator hose. Open the radiator cap and loosen the drain plug to allow coolant to drain completely.
Dispose of old coolant according to local environmental regulations—never pour it down the drain.
A note of caution: coolant poses a health hazard, so please take appropriate safety precautions when working near it.
Step 2: Remove Components Obstructing Access
In most vehicles, the serpentine belt, fan, and pulley system block access to the water pump. Use a serpentine belt tool to relieve tension and remove the belt without damaging adjacent components.
Next, remove any other obstructing components, which may include the fan, fan shroud, timing belt cover, or even the timing belt (depending on your vehicle). Label all bolts and parts if needed for easier reassembly.
Step 3: Remove the Old Water Pump
With clear access, begin removing the bolts securing the water pump. Pay attention to the bolt lengths and pattern—they must be reinstalled exactly as removed. Some coolant will likely spill during this process, so keep your drain pan in place.
Once the water pump is out, inspect the mounting surface for any remnants of the old gasket or sealant. Use a gasket scraper to clean the surface thoroughly. Improper cleaning can cause leaks in the new installation.
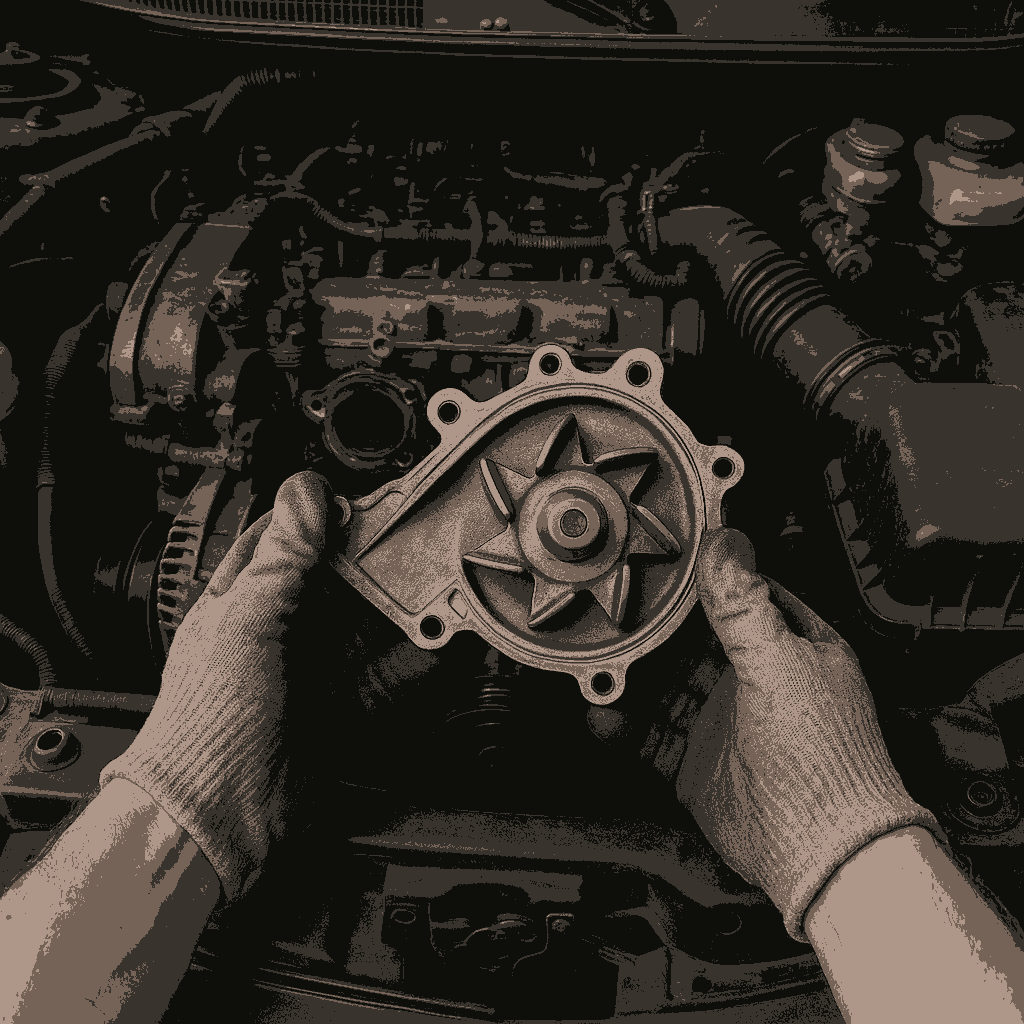
Step 4: Install the New Water Pump
Prepare the new pump according to the manufacturer’s instructions. If it comes with a gasket, apply a thin bead of gasket sealant if recommended. Position the new water pump and install the bolts in a star pattern, tightening them evenly to the correct torque specification using a torque wrench.
Be careful not to overtighten—this could crack the housing or distort the gasket. Check for any included O-rings or seals and ensure they are properly seated.

Step 5: Reassemble and Refill Coolant
Reinstall all components removed earlier: fan, pulleys, serpentine belt (using the belt tool again), and any covers. Double-check all bolt connections and clamp placements.
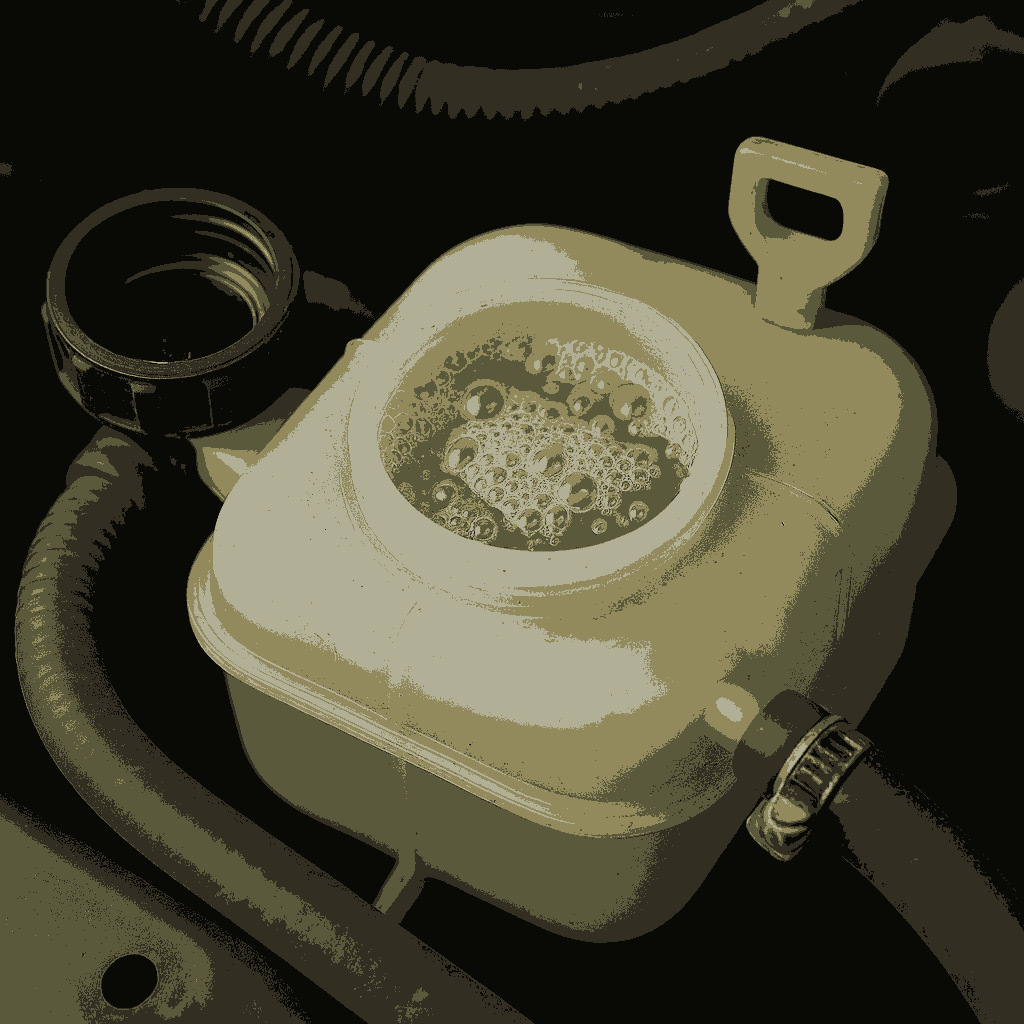
Now refill the cooling system using a 50/50 mix of fresh coolant and distilled water.
Once filled, start the engine with the radiator cap off and the heater set to high. Let the engine run until it reaches normal operating temperature and the thermostat opens. Watch for air bubbles escaping the radiator as trapped air is purged from the system. Top off the coolant as necessary.
Step 6: Check for Leaks and Final Inspection
Shut off the engine and let it cool. Inspect the water pump area, hose connections, and radiator for leaks. Also, recheck coolant levels after the engine cools, and add more if needed.
A short test drive followed by another inspection can confirm everything is working properly. If there are any leaks or strange noises, recheck your installation steps.
Final Thoughts
Replacing a water pump is a moderately complex task that can save hundreds of dollars in labor costs when done correctly. With the right tools—like a serpentine belt tool, gasket scraper, and quality coolant—you can complete this repair with confidence.
This job requires precision, patience, and attention to detail, but it’s entirely doable for most home mechanics.
Looking to take on more automotive maintenance yourself? Browse our other step-by-step guides on how to replace a power steering pump, fixing an exhaust leak without welding, or proper rust hole repair. Our comprehensive DIY section is designed to empower you to keep your vehicle running strong—without breaking the bank.