
An exhaust leak is more than just an annoying noise—it can lead to reduced engine performance, increased emissions, and potential exposure to toxic fumes. While many assume that welding is the only fix, there are effective non-welding methods that allow for safe, reliable repairs using do-it-yourself (DIY) techniques.
Whether you’re dealing with a small pinhole or a minor crack, this guide will show you how to repair an exhaust leak without welding, using commonly available products and tools.
Tools and Materials You’ll Need
Before starting the repair, make sure you have the following on hand:
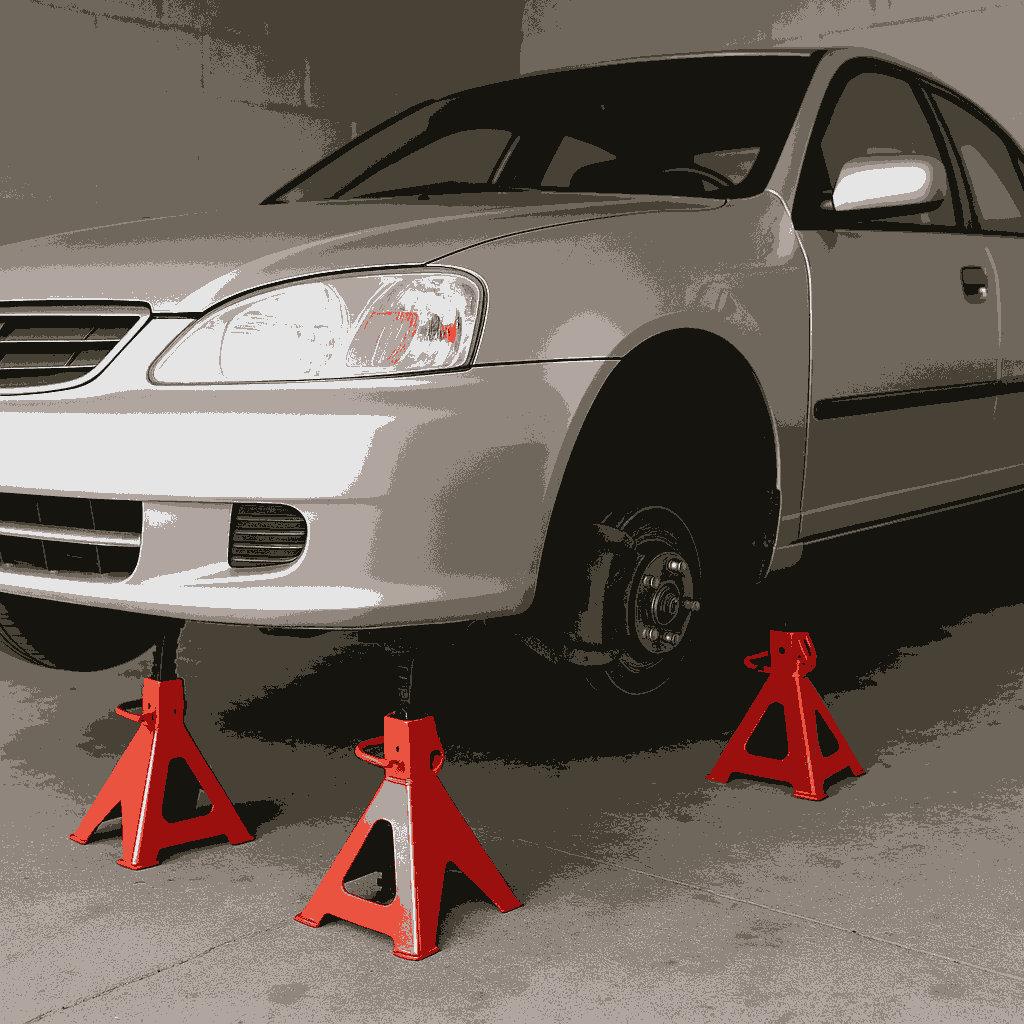
- Jack and jack stands (or ramps)
- Wire brush or sandpaper
- Clean rags
- Degreaser or brake cleaner
- Exhaust repair tape or patch kit
- Exhaust clamp (optional depending on damage)
- Gloves and safety goggles
Step-by-Step Guide to Fix an Exhaust Leak Without Welding
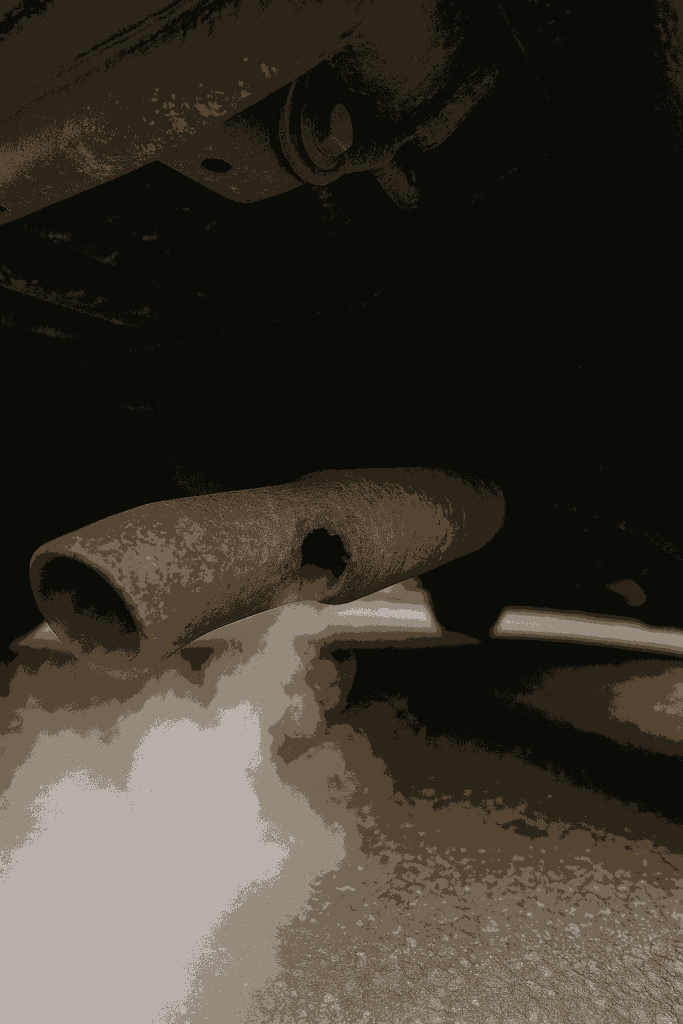
1. Inspect the Exhaust System
Park your car on a flat surface and let it cool completely. Use jack stands or ramps to safely elevate the vehicle. Locate the source of the leak by starting the engine and listening for hissing, popping, or unusual sounds.
You may also feel escaping air by running your hand carefully near the exhaust while the engine is running (do not touch the pipe). Shut off the engine once you’ve pinpointed the leak.
2. Clean the Affected Area Thoroughly
Cleaning is crucial for any sealant or tape to adhere properly. Use a wire brush or 80-grit sandpaper to remove all rust, soot, and loose material from the leaky area.
Follow up with a degreaser or CRC Brakleen Brake Parts Cleaner, which effectively removes oil and debris from metal surfaces. Wipe it down with a clean rag and let it dry fully.
3. Choose the Right Repair Method
Depending on the size and location of the leak, you can use one of the following options:
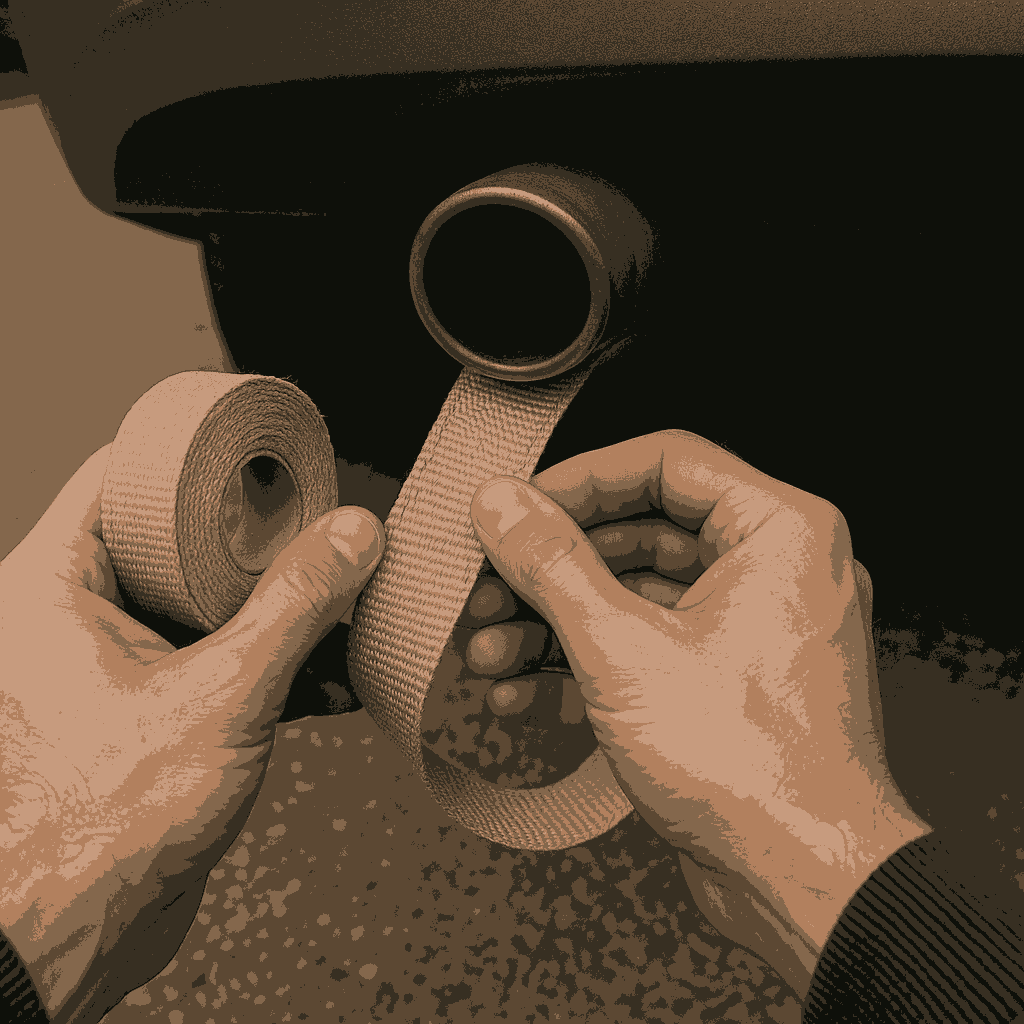
A. Exhaust Repair Tape for Small Cracks or Pinholes
Exhaust tape is a quick fix for small leaks. Wrap the tape tightly around the damaged area, overlapping each layer by at least half the tape width.
One reliable product is Permatex Muffler and Tailpipe Sealer, which is heat-resistant and designed for high-temp exhaust applications. Let it cure for the time specified in the instructions before starting the engine.
B. Patch Kit for Larger Holes
If the leak is larger, a patch kit is more appropriate.
Apply the patch material included in the kit directly over the cleaned area. One trusted option is the Versachem Exhaust System Repair Kit, which includes a durable patch and resin designed to harden with heat.
Follow the instructions carefully and allow it to cure fully before operating the vehicle.
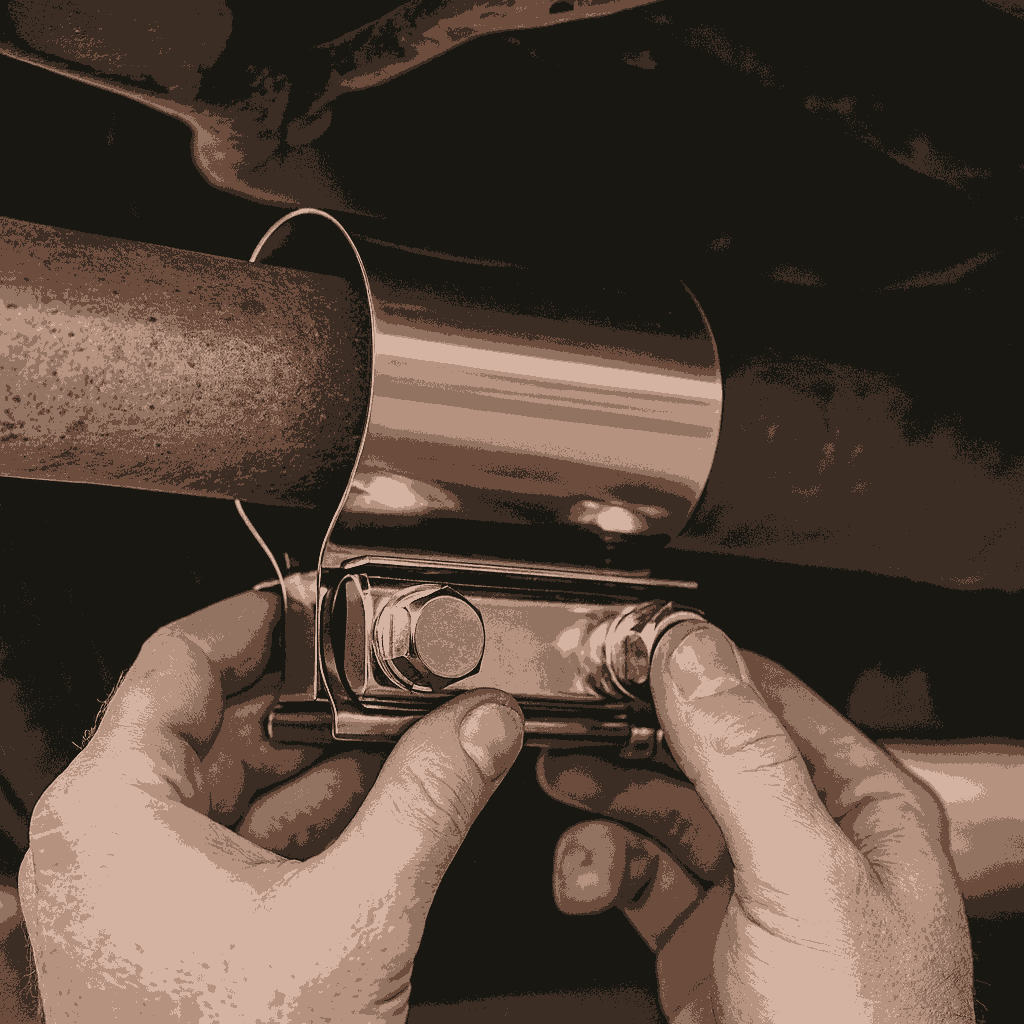
C. Exhaust Clamp for Joint Leaks or Loose Connections
If the leak is coming from a joint or a flange, an exhaust clamp may be the most secure solution. Fit the clamp over the joint and tighten it evenly using a socket wrench.
For example, the Walker 36129 Exhaust Clamp is made of corrosion-resistant steel and is ideal for sealing connections without welding. Be sure to use the correct size for your exhaust pipe diameter.
4. Start and Test the Repair
Once the sealant or patch has had time to cure (typically 1–2 hours), start the vehicle and check for any residual leaks. If no noise or fumes are detected, your repair is complete.
Monitor the area periodically for the next few weeks to ensure the fix holds, especially after long drives or high heat exposure.
Conclusions
Fixing an exhaust leak without welding is entirely possible with the right materials and a methodical approach.
Whether you use a heat-resistant exhaust tape, a patch kit, or an exhaust clamp, these non-weld solutions can restore your vehicle’s exhaust integrity safely and affordably. Always ensure proper cleaning and curing for the best long-term results.
For those looking to enhance their DIY auto repair skills, don’t stop here. Check out our detailed guide on How to Repair Wheels with Curb Rash and Scratches and explore more hands-on car maintenance tutorials on our website.
Save money, learn useful skills, and keep your vehicle in top condition.