
Deep scratches on your car’s paint are more than just cosmetic damage—they can expose the bare metal underneath, leading to rust and long-term deterioration. Unlike surface-level swirl marks or clear coat scuffs, deep scratches penetrate through the base coat and sometimes reach the primer or metal.
This article walks you through how to properly repair a deep scratch in car paint, restoring both appearance and protection. With the right tools and materials, you can complete this repair at home and save the cost of professional bodywork.
Whether the damage was caused by a parking lot mishap, a rogue shopping cart, or accidental contact with a hard surface, it’s important to act quickly. The longer you leave a deep scratch untreated, the greater the chance of corrosion, oxidation, and increased repair costs.
Taking the time to repair the scratch now can prevent more expensive problems down the line and maintain your vehicle’s resale value.
Step 1: Assess the Scratch
Before attempting any repair, you need to determine the depth of the scratch. Run your fingernail across the mark. If it catches significantly, the scratch has likely gone beyond the clear coat and into the base coat or primer. A visual inspection will confirm whether you’re dealing with exposed metal or color loss.
Only deep scratches that haven’t warped the body panel are good candidates for a DIY repair. If there is denting or severe rust, professional attention may be required.

Step 2: Clean and Prepare the Surface
Start by washing the affected area thoroughly with car shampoo and water. Removing all dirt and debris ensures contaminants don’t interfere with adhesion during repair. Dry the area completely using a clean microfiber towel.
Next, lightly sand the scratch using 1500-grit sandpaper to remove any sharp edges around the damage. Be careful not to over-sand the surrounding paint. This step helps the filler and touch-up products blend better with the factory finish.

After sanding, clean the area again—this time using 3M Automotive Paint Prep Wipes, which are designed to remove wax, grease, and oils from the surface without leaving residue.
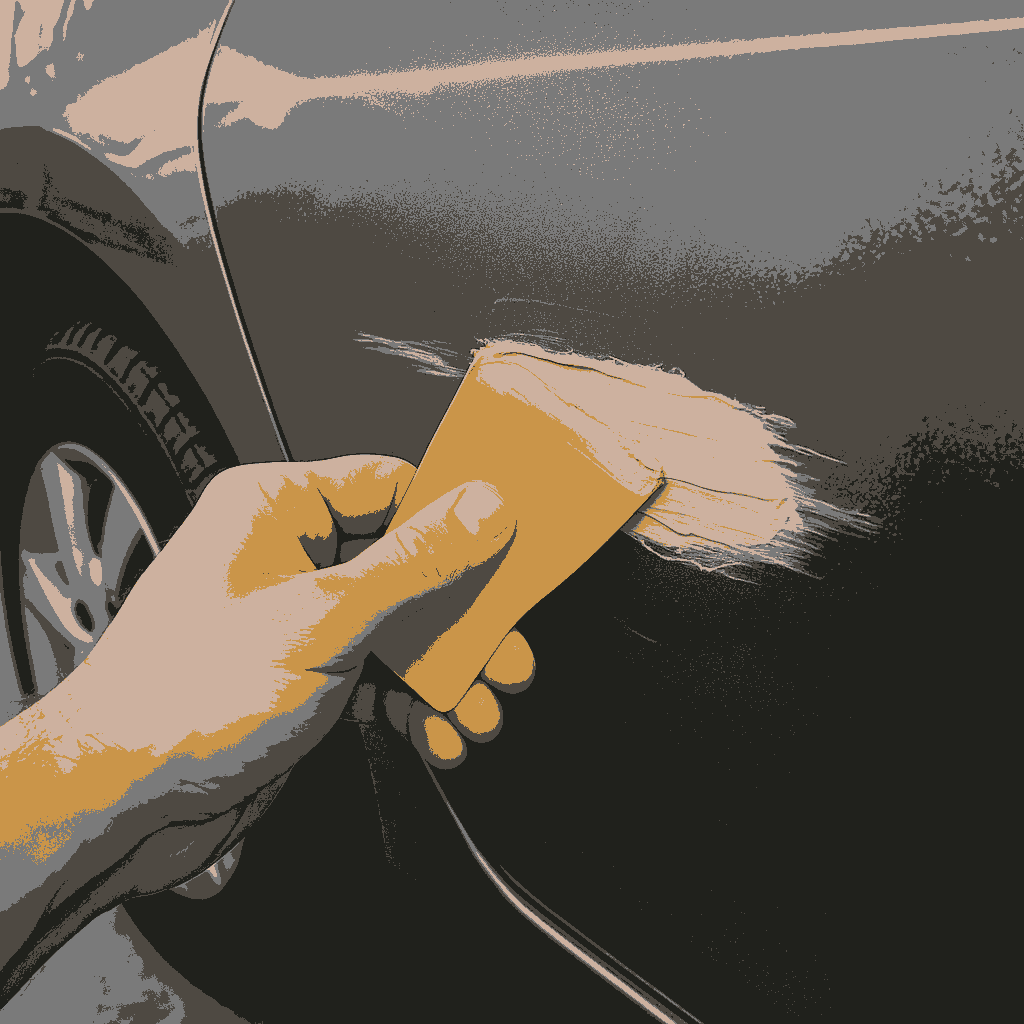
Step 3: Fill the Scratch
For deep scratches that have reached the primer or bare metal, filling the gouge is essential before applying paint. Use a quality scratch filler designed for automotive use, such as Bondo Glazing & Spot Putty. This single-component putty spreads easily and dries quickly, making it ideal for small but deep imperfections.
Apply the putty sparingly over the scratch using a plastic spreader or gloved finger. Let it dry according to the manufacturer’s instructions—usually within 15 to 30 minutes. Once dry, sand the filled area with 2000-grit sandpaper to level it with the surrounding paint. Wipe the area clean to remove dust.
Step 4: Apply Primer (If Needed)
If the scratch exposed bare metal, applying an automotive primer is necessary to ensure proper paint adhesion and rust protection. Use a small brush-on primer to coat only the filled area.
Avoid overspray, as it creates unnecessary blending work. Allow the primer to dry completely—typically one hour—before proceeding.
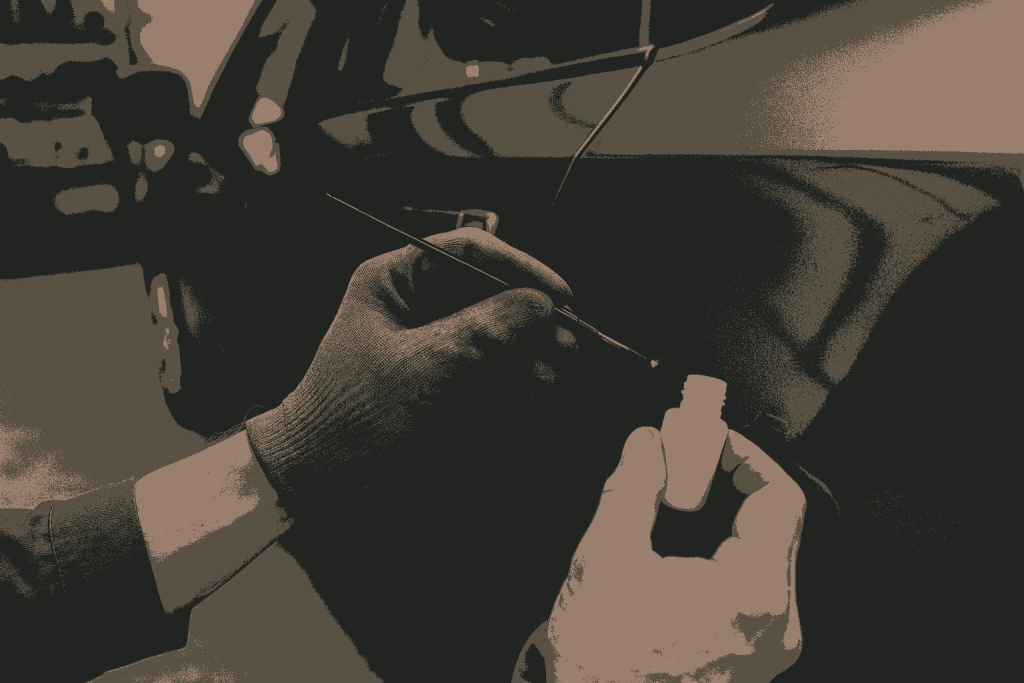
Step 5: Touch Up with Paint
To restore color, use a manufacturer-matched touch-up paint. Most automakers provide factory codes that correspond to specific shades. You can usually find this code inside the driver’s door jamb.
Apply the touch-up paint using a fine-tip applicator or the brush included with the bottle. Dab gently—don’t brush—so that you build up thin, even layers. Allow each coat to dry before applying the next. Two to three coats are usually sufficient for full coverage.
Let the final paint coat cure for at least 24 hours before moving on to clear coating.
Step 6: Apply Clear Coat
After the paint has fully cured, apply a clear coat to protect the finish and match the surrounding shine. Use a precise applicator to ensure you don’t over-apply or create drips. Allow the clear coat to dry for at least 24 hours.
To achieve a factory-like finish, lightly wet sand the area with 3000-grit sandpaper and soapy water, followed by buffing.
Step 7: Polish and Finish
The final step is polishing the repaired area to blend it seamlessly with the surrounding paint. Use an automotive-grade compound like Meguiar’s Ultimate Compound, which works effectively to level and restore shine without damaging the fresh clear coat.
Apply the polish using a microfiber cloth or dual-action polisher, working in small circles until the surface shines evenly. Finish by applying a high-quality wax to seal the area.

Final Thoughts
Repairing a deep scratch in your car’s paint takes patience and attention to detail, but the results are worth the effort. From prepping the surface to applying filler, paint, and polish, each step plays a critical role in restoring your vehicle’s appearance and protecting it from further damage.
With the help of quality products and the proper tools, a professional-grade finish is achievable in your own garage.
Although the process may seem intimidating at first, mastering basic paint repair is a valuable skill for any car owner. Not only does it extend the life of your vehicle’s exterior, but it also builds confidence in performing other maintenance tasks yourself.
If your vehicle has more cosmetic issues, you may also be dealing with damaged wheels. For a complete guide on restoring your rims, check out our article on How to Repair Wheels with Curb Rash and Scratches.