
Upgrading to a dual brake caliper setup is a common modification among performance enthusiasts, especially in drifting and drag racing applications. This setup separates the hydraulic circuits—typically allowing the factory caliper to handle regular braking, while a secondary caliper is dedicated to a hydraulic handbrake system. It offers better brake control, reliability, and avoids compromising the primary braking system during aggressive use.
This guide explains how to install dual rear calipers, walking you through the process from planning and parts selection to final bleeding and testing. Whether you’re building a drift car or looking to enhance your track performance, this modification can significantly improve your brake setup.

Planning Your Dual Brake Caliper Setup
Before grabbing a wrench, verify whether your vehicle is compatible with a dual caliper setup. Some platforms, like the Nissan 350Z, Ford Mustang, and certain BMWs, have readily available aftermarket solutions, while others may require custom fabrication.
Core Components
- Dual caliper bracket (specific to your make and model)
- Secondary calipers (often OEM or aftermarket variants)
- Brake lines and fittings
- Master cylinder or hydraulic handbrake (if applicable)
- Quality brake fluid (DOT 4 or higher)
You can pair this upgrade with a full brake fluid flush and rotor replacement for best results.
Tools and Products You’ll Need
- Floor jack and jack stands
- Socket set and torque wrench
- Brake line wrenches
- Brake bleeder kit
- Threadlocker and anti-seize
- Brake cleaner and rags
- DOT 4 brake fluid
Helpful, Commonly Used Parts
- ISR Performance Dual Caliper Bracket Kit — bolt-on solutions for several Nissan platforms
- Wilwood Caliper Set (120-6816) — lightweight secondary calipers for custom setups
- Motul RBF 600 Brake Fluid — high boiling point for track/drift heat loads
Step-by-Step Guide to Installing Dual Brake Calipers
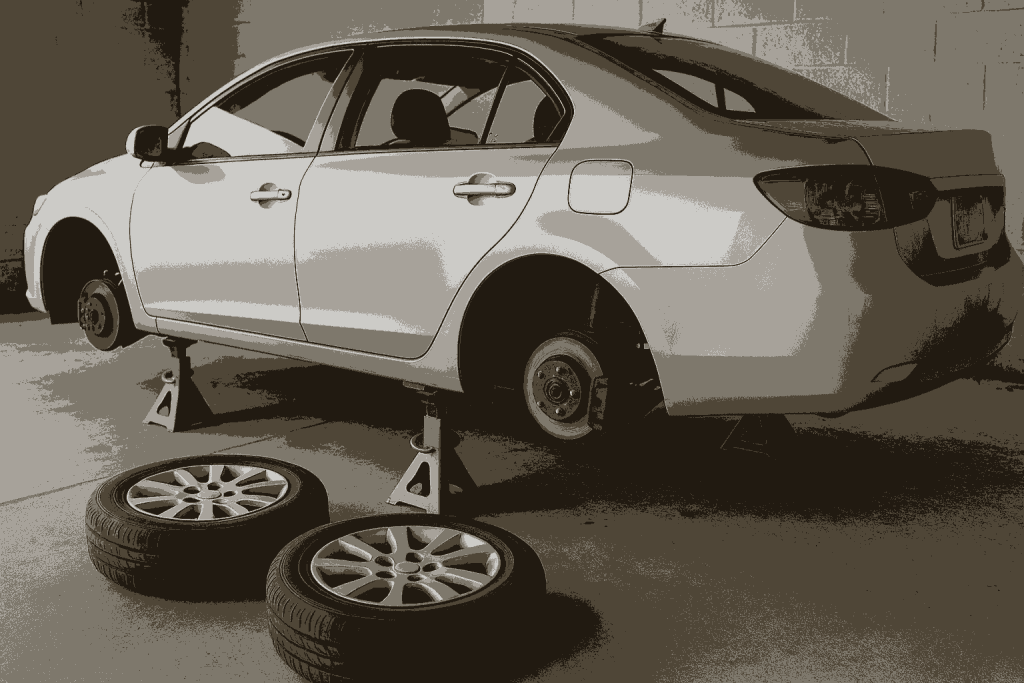
Step 1: Secure the Vehicle and Remove Components
Park on a level surface. Lift the rear with a floor jack and support with jack stands. Remove the rear wheels and brake assemblies, including caliper, pads, and rotor.
If your vehicle uses drum-in-hat parking brakes (e.g., Subaru WRX), avoid damaging the drum mechanism.
Step 2: Install Dual Caliper Brackets
Clean the knuckle surface thoroughly to ensure proper bracket fitment. Most dual caliper bracket kits bolt in using existing mounting holes; some may require longer bolts or spacers.
Apply threadlocker to mounting bolts and torque to manufacturer specs. Confirm the bracket sits flush without play or angle.
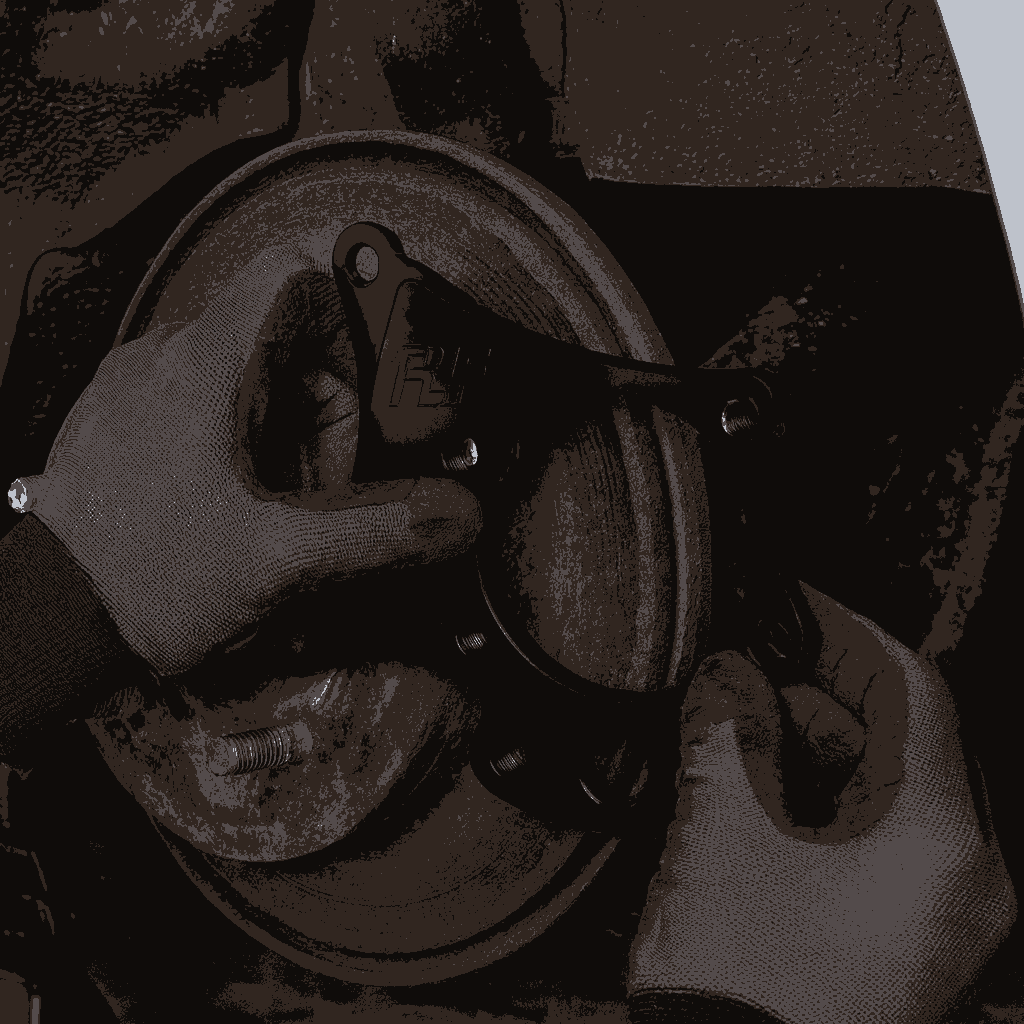
Step 3: Mount the Secondary Caliper
Install the secondary caliper onto the new bracket. Ensure correct orientation and that the bleeder screw is at the top for proper bleeding. Apply a light film of anti-seize on caliper bolts and torque to spec.
Step 4: Route Brake Lines
Run a new brake line from the hydraulic handbrake or secondary master cylinder to the secondary caliper. Stainless braided lines are preferred for durability and pressure resistance.
Secure the line along the suspension with clips or zip ties, keeping clear of moving parts and heat sources. Check full suspension travel to prevent stretching or pinching.

Step 5: Bleed the Brake System
Bleed the secondary circuit first (especially when integrating a hydraulic handbrake). Use a reliable vacuum or pressure bleeder to minimize air bubbles. If any main caliper lines were opened, bleed that circuit afterward.
Work from the caliper farthest from the master cylinder inward, topping off the reservoir throughout.

Step 6: Test and Inspect
Verify all fittings, bolts, and fluid levels. With wheels off, rotate the rotor while actuating the handbrake to confirm secondary caliper engagement.
Reinstall wheels, torque lug nuts, and perform a slow test drive in a safe area. Gradually increase brake pressure to validate both systems.
Why Dual Brake Calipers Are Worth It
A dual caliper setup increases control and reliability in performance contexts—drifting, rally, or heavy track use. By isolating braking forces, it reduces wear on factory components and gives finer control over rear-end behavior.
With quality components and careful installation, competent DIYers can complete this upgrade in a clean home garage.
Explore More DIY Performance Mods
Looking to upgrade further? Check out our in-depth DIY articles on brake replacement, LED light installation, and oxygen sensor replacement.