
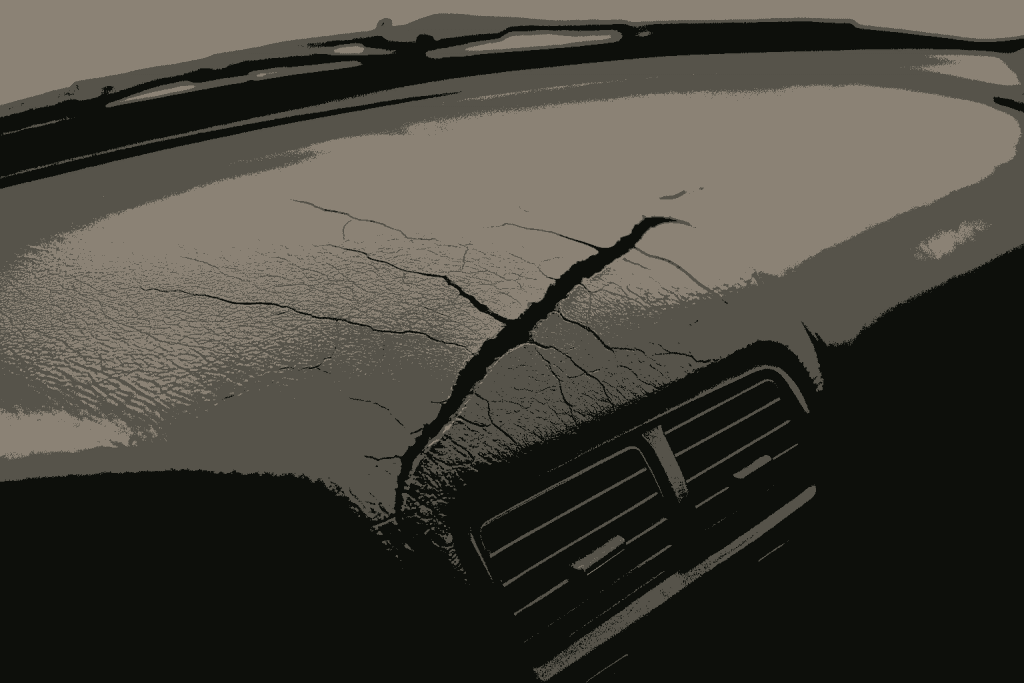
Cracked vinyl dashboards are a common problem in older or sun-damaged vehicles. Prolonged exposure to UV rays and fluctuating temperatures can dry out vinyl, leading to unsightly cracks that reduce the value and aesthetics of your car’s interior.
Fortunately, you don’t need to replace the entire dashboard or spend hundreds at an upholstery shop. With the right tools, materials, and a few hours of your time, you can restore your dashboard’s appearance at home.
This guide walks you through a professional-level process for fixing a cracked vinyl dashboard, from surface prep to finishing touches. Whether you’re restoring a classic car or simply maintaining your daily driver, this process can dramatically improve your interior.
Step-by-Step: Restoring a Cracked Vinyl Dashboard
Step 1: Inspect and Clean the Surface
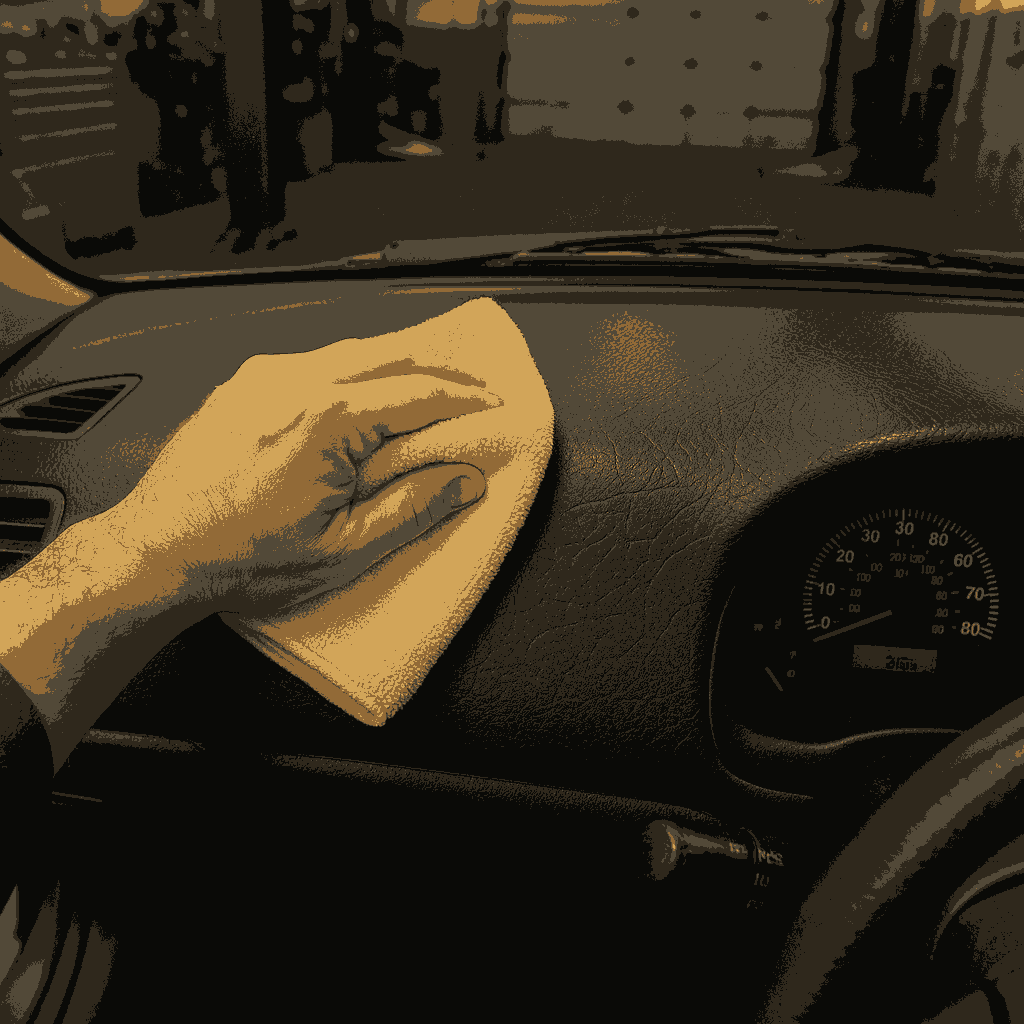
Start by thoroughly examining the dashboard to assess the extent of the damage. Small hairline cracks require different treatment than deep, structural ones. Once you’ve identified all problem areas, clean the entire dashboard surface with a non-greasy cleaner like Chemical Guys Nonsense Invisible Super Cleaner. This product effectively removes dirt, oils, and silicone residues that could interfere with adhesion later.
Use a microfiber towel and scrub all surfaces gently. Pay special attention to the cracks and surrounding areas to ensure that no debris remains.
Step 2: Sand and Widen the Cracks
Use 220-grit sandpaper to lightly scuff the entire dashboard surface, especially around the cracks. For deeper fissures, use a razor blade or utility knife to slightly “V” out the cracks. This ensures that the filler you apply later can properly bond to the surface and doesn’t lift over time.
After sanding, wipe the dashboard down with isopropyl alcohol to remove any remaining dust or residue.

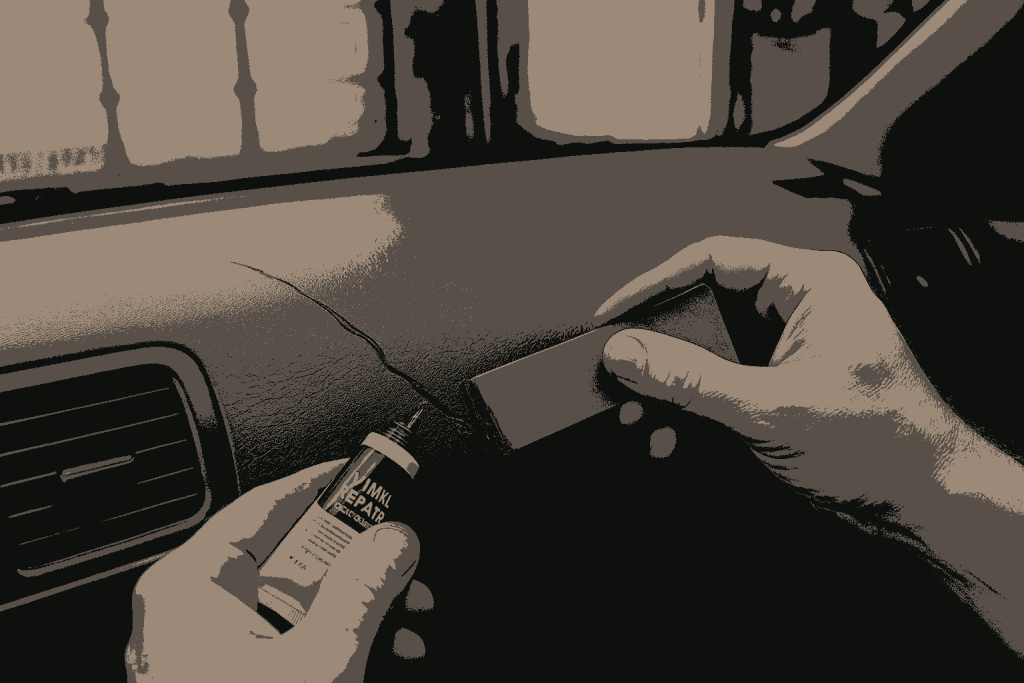
Step 3: Fill the Cracks
Apply a high-quality vinyl repair compound to the cracks. 3M Leather and Vinyl Repair Kit is an excellent option for this step, as it includes a vinyl filler, grain papers, and color-matching compounds. Use a plastic spreader or a putty knife to push the filler into the crack, slightly overfilling to account for shrinkage during curing.
Let the filler dry per the manufacturer’s instructions—usually 30 minutes to an hour. For deeper cracks, a second application may be necessary. Once fully dry, sand the area smooth using 320-grit sandpaper.
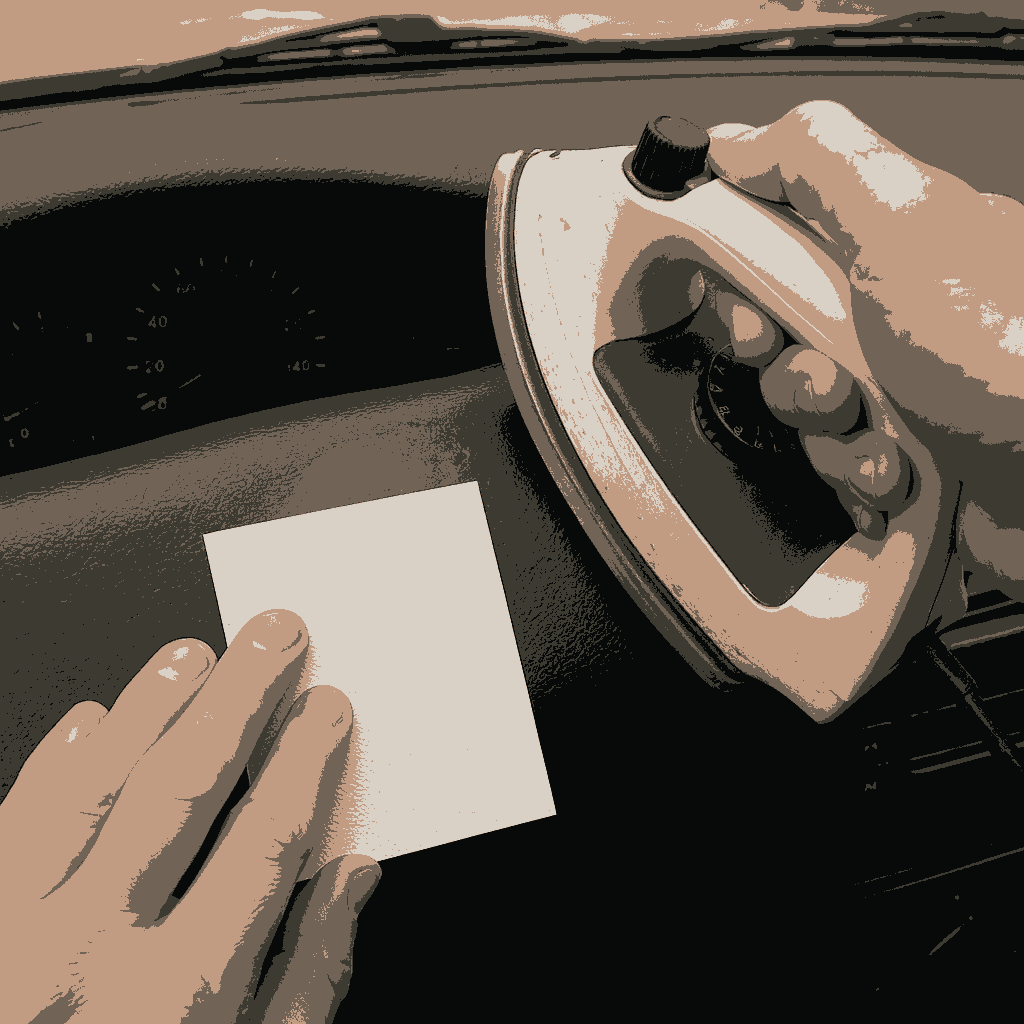
Step 4: Re-Texture the Surface
If your dashboard has a textured finish, you’ll need to restore that texture to avoid a mismatched appearance. Most repair kits, including the one from 3M, include textured grain paper that can be heat-transferred onto the repair area.
Place the grain paper over the repair compound, and use a heat tool or household iron (on low heat) to transfer the texture. Follow instructions carefully to avoid overheating and damaging the vinyl.
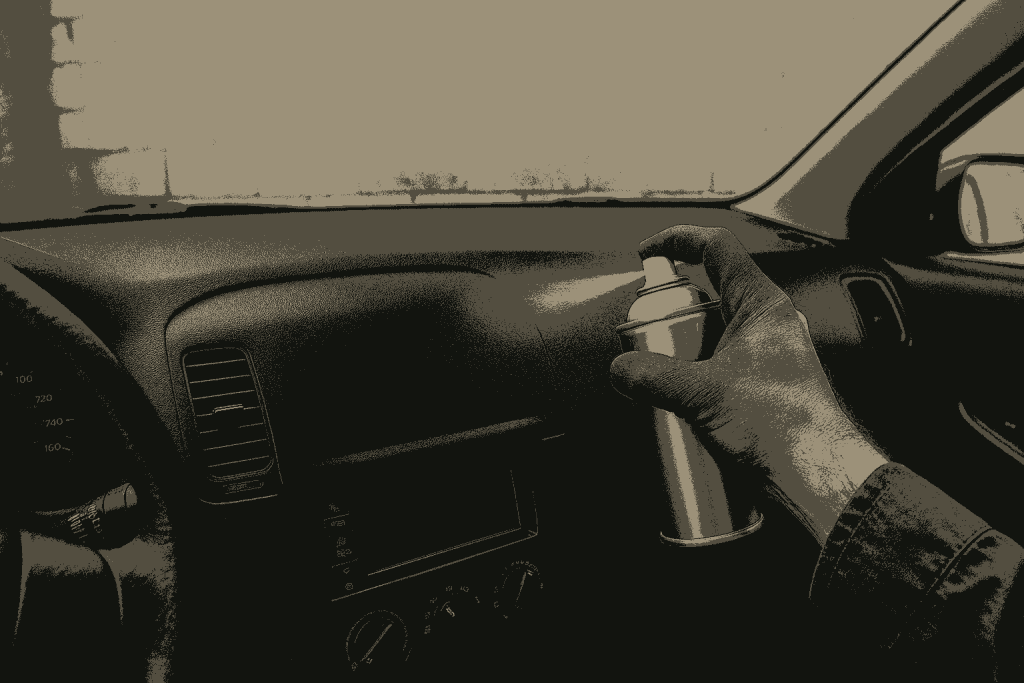
Step 5: Repaint the Dashboard
Once your surface is smooth and properly textured, it’s time to repaint. Use a vinyl-specific spray paint like Dupli-Color Vinyl & Fabric Coating. This product adheres well to flexible surfaces and offers a professional finish that resists cracking and peeling.
Hold the can 6–8 inches from the surface and apply thin, even coats. Typically, 2–3 coats are enough to achieve uniform coverage. Allow proper drying time between coats and at least 24 hours of curing before exposing the dashboard to sunlight or use.
Step 6: Final Conditioning and UV Protection
After painting, protect your newly restored dashboard with a UV-blocking conditioner. Products like 303 Aerospace Protectant can extend the life of your repair by shielding the vinyl from future sun damage. Apply the conditioner using a clean microfiber cloth, and reapply every few months as part of your maintenance routine.
Restoring a cracked vinyl dashboard is a manageable DIY project that can transform your vehicle’s interior. With careful preparation, the right materials, and attention to detail, you can avoid costly replacements and achieve professional-looking results at home.
This type of repair not only improves the visual appeal of your car but also helps maintain its resale value. A well-maintained dashboard reflects the overall care of a vehicle and signals to buyers or passengers that the car is in good hands.
If you found this guide useful, explore our other blog posts on DIY vehicle repair and remodeling. From fixing windshield cracks to restoring faded headlights and repairing curb rash on wheels, our site provides in-depth tutorials to help you take full control of your car’s upkeep—all without breaking the bank.