
Universal joints, commonly known as U-joints, are a vital component of a vehicle’s drivetrain. Found on rear-wheel and four-wheel drive vehicles, U-joints allow for flexibility between the driveshaft and differential or transmission.
When these joints begin to fail, they can cause significant vibration, clunking sounds, and even complete drivetrain failure if left unattended.
Recognizing the signs of a worn U-joint early can save you time, money, and headaches. Fortunately, with the right tools and guidance, replacing a U-joint is a job many DIY mechanics can tackle at home.
How to Diagnose a Bad U-Joint
Before replacing a U-joint, you need to confirm that it’s the actual source of your drivetrain issue. Here’s what to look for:
- Clunking Noise: A distinct metallic clunk, especially when shifting from reverse to drive, is a classic symptom.
- Vibration: Excessive vibration at highway speeds could indicate U-joint wear.
- Rust or Grease Leaks: Check the joint area for rust or leaking grease, both signs of seal failure.
- Movement Test: With the vehicle in park and wheels chocked, crawl underneath and grasp the driveshaft near each U-joint. Any noticeable play or clicking is abnormal.
Tools and Materials You’ll Need
- Jack and jack stands
- Socket and wrench set
- Hammer and punch
- Snap ring pliers
- Replacement U-joint
- Grease gun (if using greaseable joints)
- Safety glasses and gloves
Using a Powerbuilt U-Joint Removal Tool Kit can significantly streamline the job. This press-style tool allows you to remove and install U-joints without needing a hydraulic press, making it ideal for garage DIYers.
Step-by-Step: How to Replace a Universal Joint
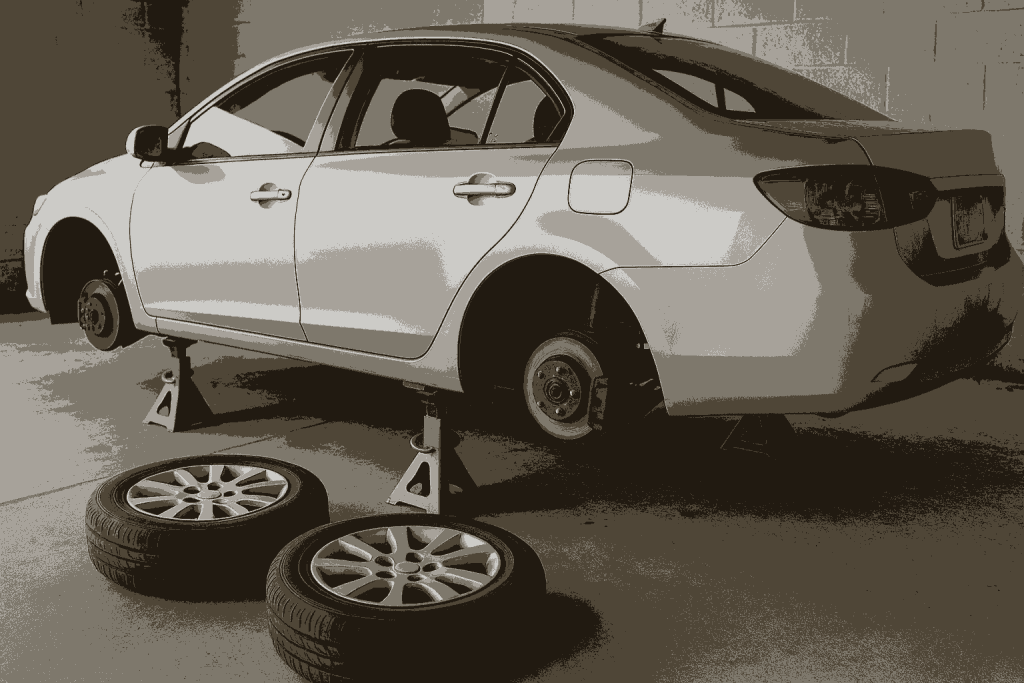
1. Secure the Vehicle
Begin by parking on a flat, stable surface. Set the parking brake and chock the wheels. Use a jack to raise the vehicle and secure it with jack stands at all four corners.
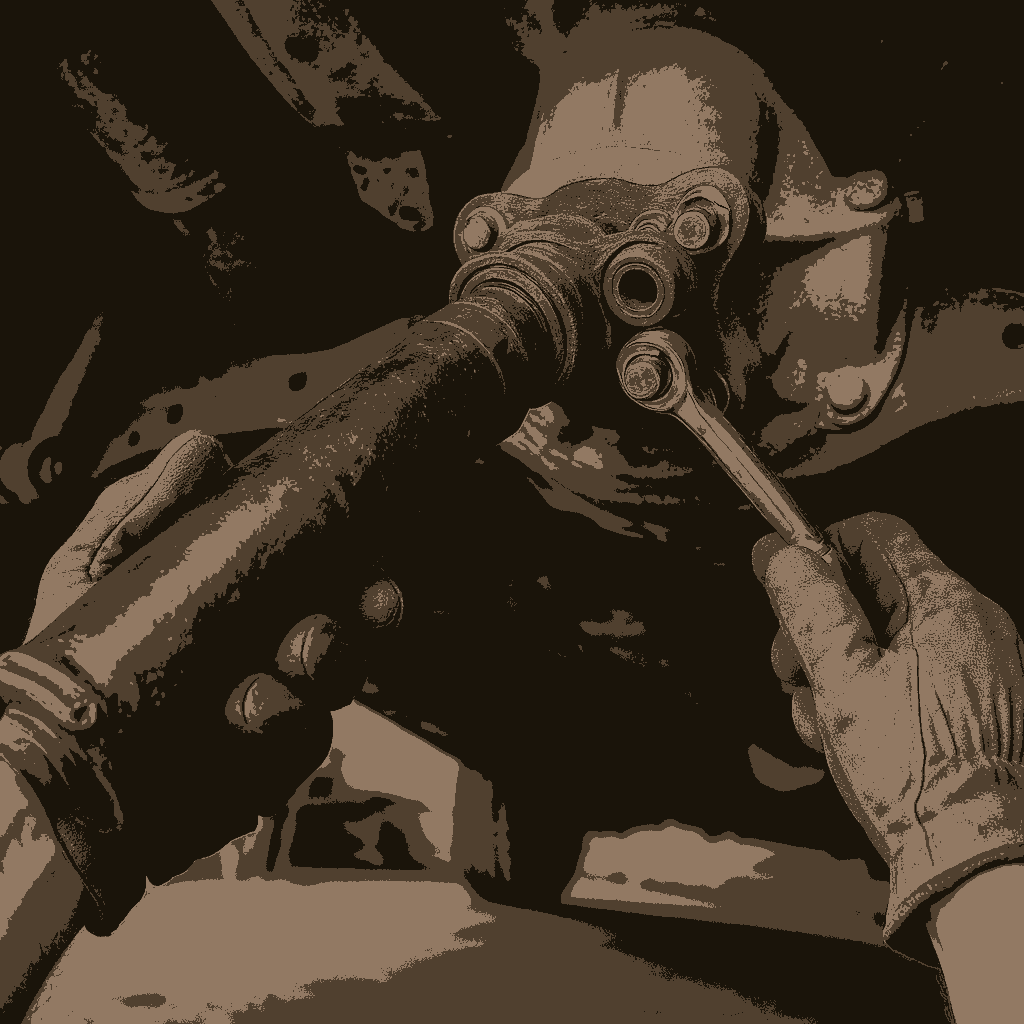
2. Remove the Driveshaft
Locate the U-joint that needs replacing. Mark the orientation of the driveshaft with a paint pen to ensure correct reinstallation.
Unbolt the driveshaft from the differential yoke and gently lower it. Be cautious—fluid may leak from the transmission.
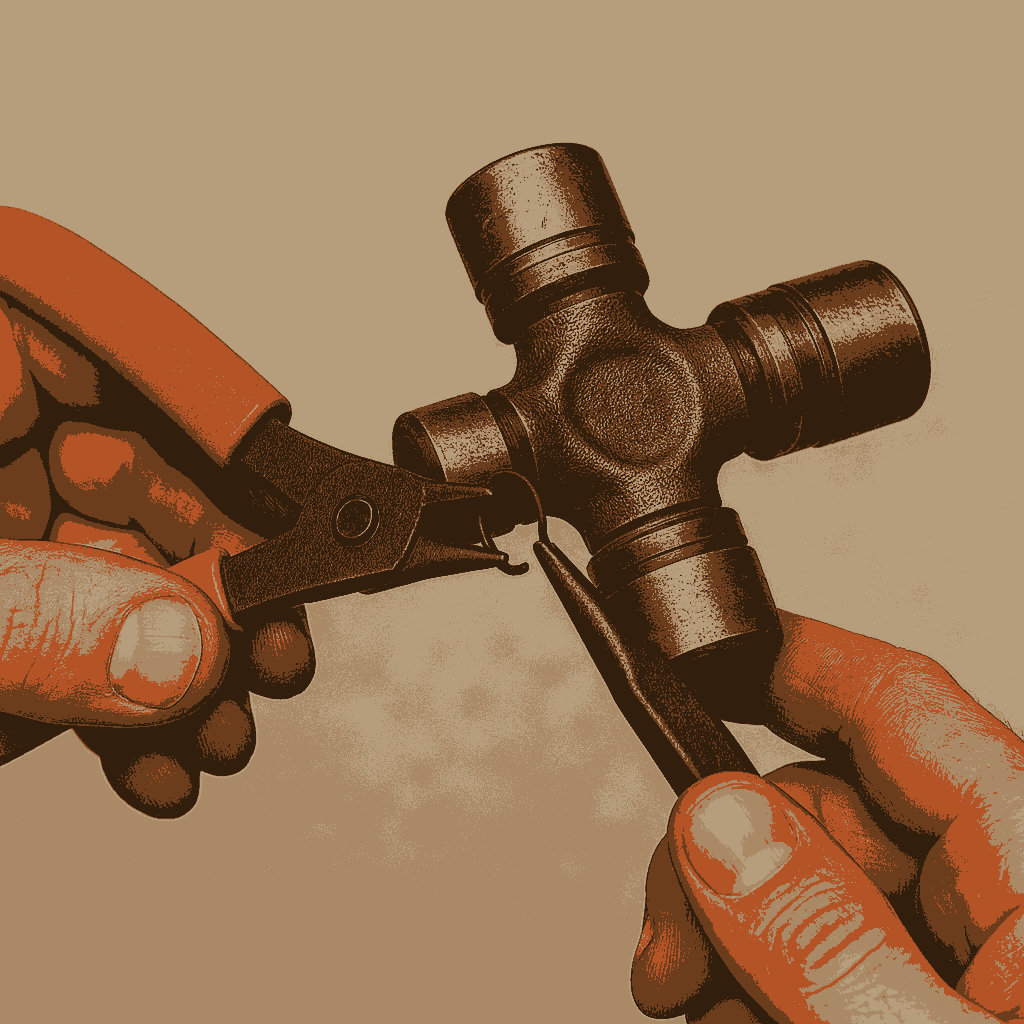
3. Remove the Old U-Joint
Use snap ring pliers to remove the retaining clips from the U-joint caps. Next, use a hammer and a punch to drive one cap inward, which pushes the opposite cap out. Once one cap is out, repeat the process for the other side.
If you have access to a Lisle U-Joint Press, this is the ideal moment to use it. It applies even pressure and greatly reduces the risk of damaging the yoke during removal.
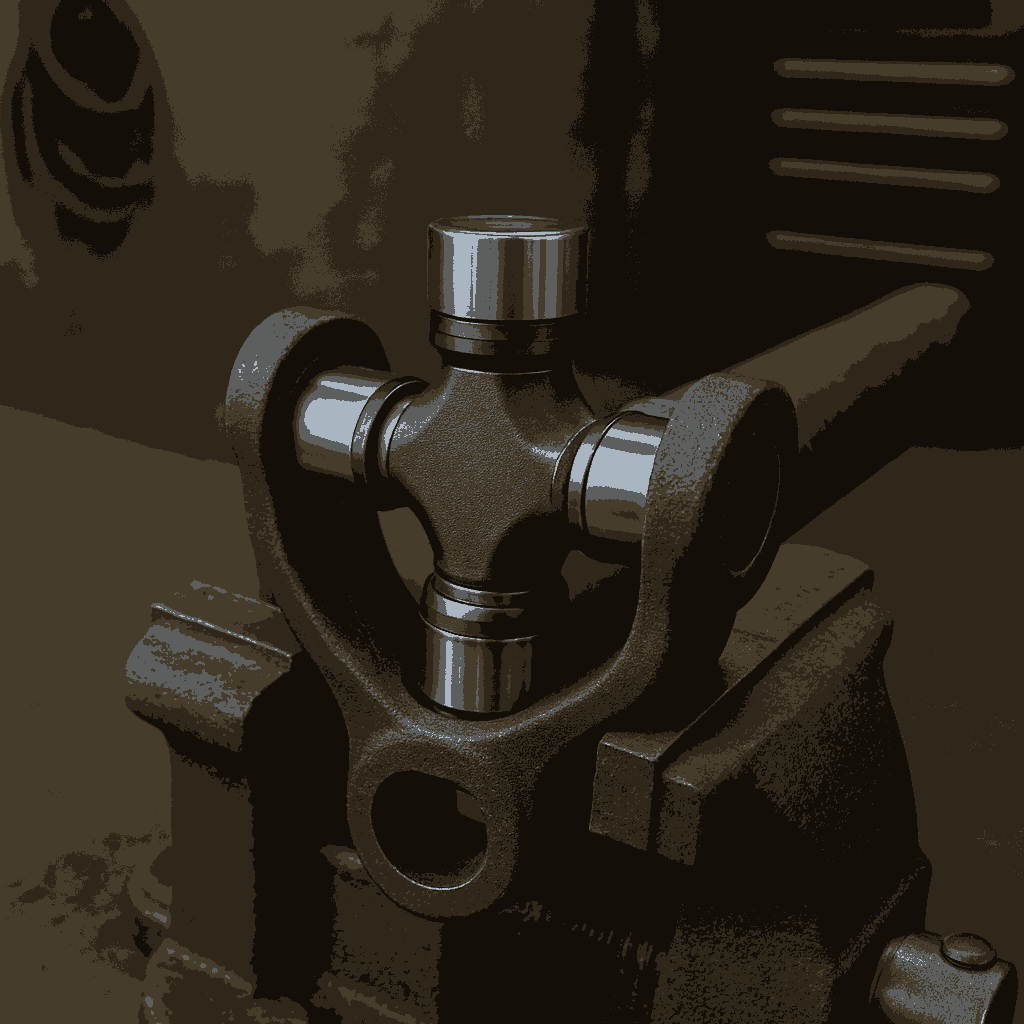
4. Install the New U-Joint
Slide the new U-joint into position, carefully fitting each cap one side at a time. Press the caps in using your tool or a bench vise. Reinstall the snap rings once the caps are flush and properly seated. Spin the joint by hand to ensure smooth movement.
If you’re installing a greaseable joint, apply fresh lubricant using a Valvoline Professional Series Grease Gun—it’s known for its clean operation and precise delivery, perfect for tight spaces.
5. Reinstall the Driveshaft
Align the driveshaft with your earlier marks and bolt it back to the differential flange. Torque the bolts to the manufacturer’s specification. If transmission fluid leaked earlier, top it off before driving.
Post-Replacement Check
After the replacement, take a short test drive and pay close attention to how the vehicle feels and sounds. The clunking should be gone, and any previous vibration should be significantly reduced or eliminated.
Recheck the fasteners and inspect the joint after a few days of driving to ensure everything remains tight and properly lubricated.

Diagnosing and replacing a worn U-joint may seem intimidating, but with the right tools and a careful approach, it’s a manageable task for most experienced DIYers. Addressing U-joint issues early not only restores smooth operation but also prevents potential damage to the driveshaft or differential.
Just remember: safety first, take your time, and consult your vehicle’s service manual for torque specs and part compatibility.
If you found this guide helpful, you may also want to check out our article on How to Repair Wheels with Curb Rash and Scratches.